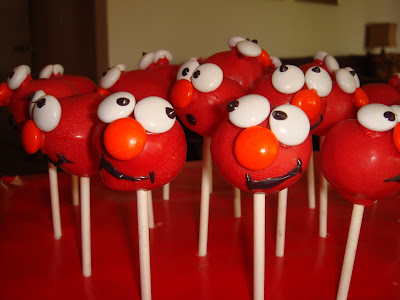
For Harrison's birthday I made Elmo cake pops. They were a huge hit, even if I do say so myself ;-)
I got the idea from a blog I read by Bakerella. Its an awesome blog, go check it out! Her cake pops are inspiring, i love the Easter ones best.
Here's how Jules and I made them....
I started by baking a cake mix, any old cake mix will do. This is the cake mix I used.

Let the cake mix cool completely, or overnight like I did. Then break it all up into small crumbs in a large bowl, and mix in a can of Cream Cheese Frosting. you can use home made cake and frosting if you wish, but there's lots of hard work coming so the package ones are good enough. I didn't need the whole can of frosting as the cake was Super Moist. It wants to be moist enough to roll into a ball, but not sticky.

Here is how mine looked in the bowl (I had rolled most of it at this point)

Roll into quarter sized balls, and place on greaseproof/parchment paper.
I made over 60 balls, it goes a long way!

Melt some red Candy Melts, I did mine in the microwave. They are coloured chocolate chips that taste like those cheap chocolate mice you ate as a child. you can get white and dye them any colour, or purchase some already in a choice of colours.

Take a lolly stick and dip the end in the candy melts, then into each one of the cake pops.
Purchase shorter lolly sticks as they become top heavy!

Place in the freezer until firm enough to handle then remove a few at a time to decorate.
Dip the pops into a bowl of candy melts and tap gently on the side to remove excess. Its a little tricky at first to get them the right round shape, but after about 30 you get the hang of It.
Then using a dab of candy melts as glue stick on white M&Ms as eyes.

And orange M&Ms and noses.

Dye some Candy Melts black and paint on eye balls and mouths in an array of shapes.
This the fun part! We used a cocktail stick but a little paint brush would work too.
Or you can buy an edible ink pen which may be easier.

Here's how they turned out!

I liked the pink insides. They are super sweet and super tasty!

Here's lots of photos of Jules and my hard work!


1 comment:
They look awesome!
Post a Comment